
It is easy to change a floor tile, but you must take care not to damage the surrounding tiles.
To change a floor tile, remove the surrounding grout, remove the tile to be changed and stick a new tile.
1. Remove the joints around the tile to be changed
Use a tile scraper to remove the grout around the tile to be changed:
– Take a tile scraper and scrape out the grout.
– Be sure to scrape the joints to their total thickness.
2. Break the tile to be replaced
Use a hammer and a chisel to break the tile:
– Place the chisel in the centre of the tile.
– Use hefty blows with the hammer to break the tile.
In the case of thick floor tiles
To remove a thick or large floor tile, use a grinder equipped with a diamond disc to remove the joints and cut the tile.
Clear the joints with the grinder
Joints should be thick enough to allow the grinder disc to pass through; if they are too thin, the grinder may damage the tiles.
To remove grout with the grinder
– Wear safety glasses.
– Turn on the grinder, tilt it slightly downwards and run it over the grout to remove it.
– Clear the joints to their full thickness.
– Proceed slowly so that the grinder does not slip on the adjacent tiles, leading to scratching or cracking.
Cut the tile with the grinder
– Wear protective glasses.
– Turn on the grinder and tilt it down to cut the tile.
– Cut the tile crosswise (make both diagonals).
3. Remove the tile to be replaced
Remove the tile with a flat chisel and a hammer:
– Place the flat chisel in the centre of the tile at a crack.
– Tilt the chisel and hammer out the pieces.
– Always work from the centre to the edges to remove the tile pieces without damaging the surrounding tiles.
4. Clean the surface
Remove any remaining adhesive mortar (tile adhesive):
– Scrape off traces of adhesive mortar with the flat chisel.
– Use a damp sponge to remove the last traces of dust.
– Clean the debris with a broom or hoover.
5. Glue the new tile
After removing the defective tile, replace it with a new tile of the exact dimensions:
– Use ready-to-use tile adhesive.
– Using a notched spatula, spread adhesive in the area you have cleaned.
– Also, glue the back of the tile. Do not apply too much glue to the edges.
6. Place the new tile
Once the gluing operation has been completed, you must place the tile.
– Place the new tile at the correct distance from the joints: use spacers.
– Using a rubber mallet and a bat, press the tile in at the same level as the others. If you do not have a rubber mallet, use a hammer with a cloth around it.
– Do not place the bat on the tile to be replaced only. Place it at an angle on several tiles. This way, you will know at what level you need to hammer the tile to make it even with the others.
– Clean any traces of glue from the tile with a damp sponge and then a dry cloth. Do not press down on the tile you have just laid!
– Once the tiles have been laid, allow them to dry while the adhesive mortar sets. Do not forget to remove the spacers before the adhesive has completely set.
Important: Do not step on the tile you have just laid until the adhesive has dried completely (approx. 24-48 hours).
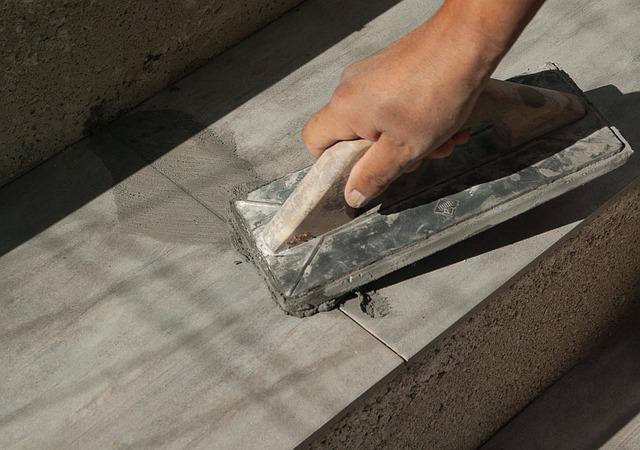
7. Making the joints

Once the adhesive mortar is dry, you must lay a joint to ensure that the tiles are watertight.
– As with the adhesive mortar, prepare the joint mortar.
– Using a rubber scraper, place your mortar at the joints and spread it at an angle to penetrate between the tiles: the cavities must be full.
– Smooth the joint with the squeegee or with your finger.
– Clean up any grout traces on the tiles with a damp sponge. Do not press on the joints so as not to dig them up.
– Finish with a dry cloth.
– Leave to dry for the time indicated on the packaging.
Tip: Wait at least 48 hours before washing the tiles.
8. If white marks appear on the joints
White marks may appear on the joints once they have dried: this is the cement veil. You can use a special cement veil product or hydrochloric acid to remove these marks.
Case 1: Removing traces with a unique “cement veil” product
– Use a particular product to remove traces of cement veil.
– Soak a sponge in the product and spread it over the joints and tiles.
– Scrub with a brush until the marks disappear.
– Leave for the time indicated on the packaging.
Case 2: Remove marks with hydrochloric acid
Clean the marks with a mixture of water and hydrochloric acid:
– Wear household gloves to protect your hands.
– Mix water and acid in the following proportions: 1/4 hydrochloric acid to 3/4 water.
– Always pour the acid into the water, not the other way around.
– Dip a brush into the hydrochloric acid/water mixture.
– Scrub the tiles and joints with the brush until the marks disappear.
– Once the marks have been removed, rinse the tiles with clean water.
Materials for changing a floor tile
Adhesive mortar
Flat chisel
Tile scraper
Ready-to-use joint mortar
Notched spatula
Protective goggles
Tiling bat
Rubber mallet
Tiling scraper
Hammer
Chisel point